4 Factors that Affect Muscle Memory Development
 The human body is a fascinating structure, an intricate set of interrelated subsystems all hardwired for our survival. Muscle memory is an interesting phenomenon, involving a relationship between our muscles and their interaction with the brain. Muscle memory is often referred to in the martial arts. But exactly how and why does muscle memory develop? And what of Muscle Memory’s often overlooked little sibling, Muscle Confusion? This blog is an introduction to a 3-part series on this topic.
What is Muscle Memory?
The theory behind muscle memory is that anyone learning a new activity, or practicing an old one we use our brains extensively. A child learning to walk is gradually building neural pathways using the conscious mind to give the muscles a sense of muscle memory. In other words, even without thinking, the child is soon able to walk, and the muscles are completely accustomed to this process. The child no longer has to tell the body to walk; the body just knows how to do it, thanks to neurons that communicate with the muscles and say, “walk now.”
Muscle memory thus becomes an unconscious process. The muscles grow accustomed to certain types of movement. This is extremely important for the martial arts. The more often you train a certain skill, the more likely you are to do it as needed, when needed. If you’ve trained to respond in a certain way against a certain attack a thousand times. You don’t have to think about the specific combination of defensive techniques. Your body knows how to do it on demand.
5 Factors that Affect the Development of Muscle Memory
There are a number of factors that can affect the development of muscle memory. Understanding them is important for an instructor as it helps them to run a class that helps promote faster and better learning. As a student, understanding these factors helps you to understand what you can do to help improve your training habits.
1. Regular Training. Instructors know that the more a student practices, the better they get. Conversely, if a student only show up to class sporradically, it’s difficult for them to make progress. Students should strive to train at least twice a week, especially in the early stages of learning.
2. Repetitive Practice. Within class training time, students need to get sufficient opportunities to repeat techniques in order to develop muscle memory. This is why it’s important to curb the desire to discuss the performance of a technique at length in class, both as an instructor and as a student. While a student does need to understand the fundamentals of what they’re about to practice, an instructor that talks too much robs the student of valuable opportunities to develop muscle memory. An instructor also needs to let their students practice a technique enough times to get a feel for it before calling the class to order to introduce the next technique. Students, on the other hand, who like to discuss the technique during their practice time are also inhibiting their ability to develop muscle memory for the technique. It is also important to remember that repetitive practice ingrains a physical skill, whether you’re doing it right or wrong, so a student should always aim for perfect technique or as close to it as possible while practicing, even if it means doing the movements slower.
3. Age. It is widely known that children, once they have reached a certain age of motor skill development, are able to learn new physical skills fairly quickly. This is true of the martial arts too, but due to some of the mental apsects of training like focus, control, comprehension of application, and memory, they don’t necessarily advance as quickly as adults. This is why a lot of dojos refrain from teaching more complicated martial arts techniques to children at too young an age. And while there are few studies examining the development of physical skills in older adults, from experience, I can say that it usually takes them longer to develop muscle memory, especially when the skill is entirely new to them. They have to reprogram their bodies and unconscious minds to do things, fighting ways of moving that have become ingrained over decades of life.
4. Previous Physical Experience. I’ve always maintained that students who come into the martial arts with a previous background in dancing tend to learn martial arts more quickly. Dancing uses the body in a wide variety of ways and gets the person used to putting together strings of movement. Even though on the surface dancing seems completely different, it is actually very complementary to learning a martial art. Of course, there are other physical activities that share these qualities, but dancing stands out strongly in my mind. Conversely, if a person has previous experience in a different martial art, if there is a lot of cross-over, they may find the initial learning experience to be a little frustrating as their body has a tendency to do what it has already learned in a similar context. That being said, if one is patient enough to get past the early difficulties, a student with prior experience that is relevant to the art they’re currently studying may see an acceleration in their learning process.
The next two posts to follow will discuss ways to take advantage of the body’s ability to develop muscle memory and how to play off the concepts of muscle memory and confusion to develop technique and strength for the martial arts.
Top 5 Cross-training Activities for Martial Artists
As an instructor, I’m often asked what types of exercise I recommend outside of our classes for cross-training. If you’re looking for a complementary cross-training activity, it’s important to choose something that helps develop the type of body that allows for the style of movement you’re trying to develop as a martial artist. Here is my list of 5 activities that I recommend to my students:
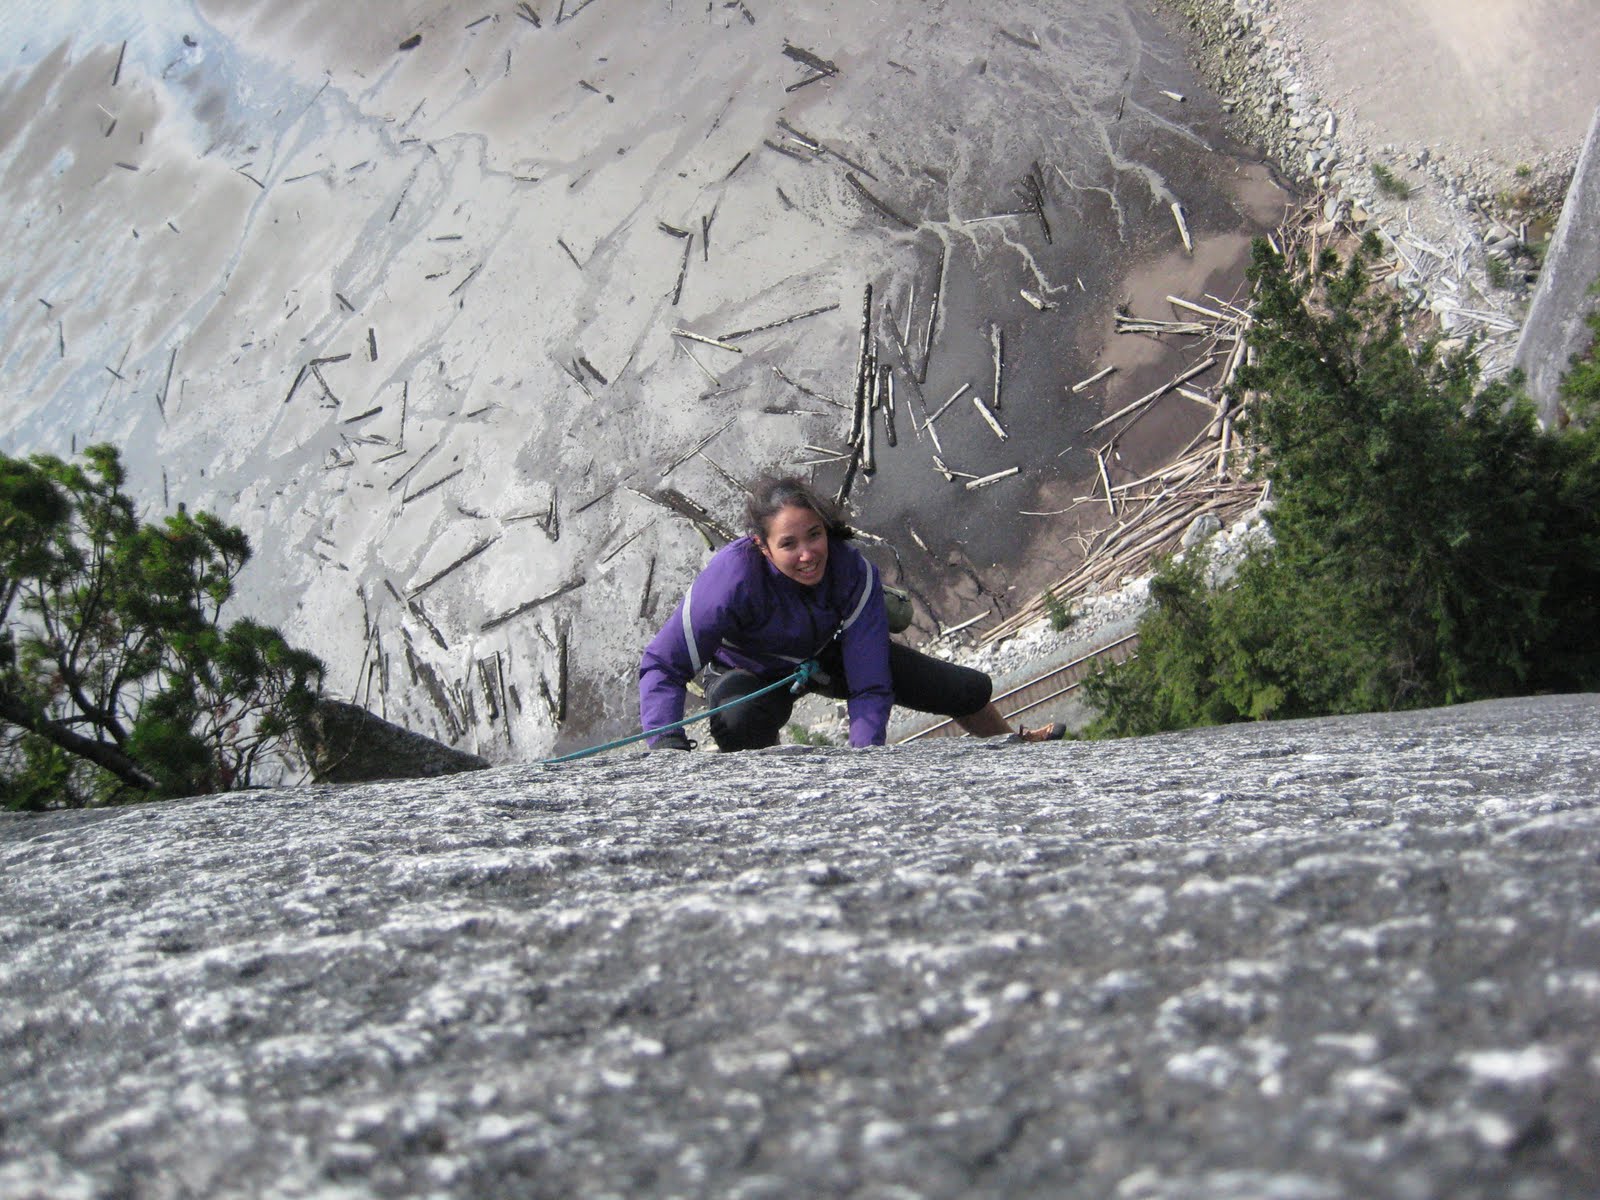
1. Rock/Wall Climbing. Climbing is an excellent activity for martial artists because you use the entire body to do it. It tones the body without bulking up and develops muscular endurance. It can also help develop flexibility, depending on your climbing technique. Furthermore, it involves a great deal of technique in order to be an efficient climber, a principle martial artists should become very familiar with the longer they train. It’s also great for developing a strong grip, which is important for grapplers. Whether you do it on an actual rock face or at a climbing gym, you’ll get these benefits. I like to go climbing outdoors in Squamish (see below) in the summer and wall climbing in the winter.
2. Yoga. Like climbing, yoga tones the whole body. It tends to be a lower impact activity with strong emphasis on stretching, making it a good recovery exercise for the day after a particularly hard workout. It’s also great for increasing overall flexibility, which is important for injury prevention. What’s nice about yoga, is that it’s easy to fit into your daily training regimen. I have a couple of series’ of 20-minute workouts on DVD (including Am Yoga for Your Week – DVD) that I use every weekday when I get up in the morning. If you’ve never done it before, it’s a good idea to also take classes so you develop proper technique.
3. Running and/or Skipping. As a martial artist, it’s important to have good cardio. Aerobic exercise is important when prepping for belt tests to keep you performing strong even toward the end of the test. Anaerobic exercise is important for high intensity activities over the short term, like sparring, grappling, training circles, or for the potentially high intensity situation of a real self-defense situation. Both running and skipping are great forms of cardio training. Running can be adapted in different ways too like interval running (switching between regular running and sprinting), running up hills or stairs to develop leg strength, etc. Many people don’t think they can run, believing it to be too hard on their particular body. Unless you have some sort of injury that prevents it, everyone can run. You just have to start slow and work the body up to it. Start by walking more than running. Start by walking 4.5 minutes and running half a minute, repeating this for 30 minutes. Then, every time you go to run, increase the running and reduce the walking in each interval by 30 seconds until eventually you’re running the full 30 minutes. Skipping is good for cardio training and also develops timing and coordination. You can also do interval training by adding in double skipping into your routine. See the video below for an example of double skipping.
4. Strength Training that Uses Core Muscles & Stabilizers. This includes pilates, fitness ball, kettle bell, medicine ball, and many types of isometric exercise. Many people want to do a form of strength training in addition to their martial arts training, but most people think only of weights. Weights, the way they are traditionally used, focus more on the “mover” muscles, the ones that propel you, but don’t do as much for the “stabilizer” muscles, which hold your parts in place and prevent you from being damaged while the movers are moving you. The stabilizers are very important for martial artists to protect you, especially when doing explosive movements. Developing your core usually goes hand in hand with your stabilizers because your core (abs and lower back muscles) stabilizes your centre body. A lot of important movements come from the core in the martial arts, so it’s important to develop your core strength.
5. Dancing. This may seem like a strange choice, but some of the finest martial artists I’ve trained came to it with a background in dancing. Dancing teaches coordination, timing, choreography and body awareness. Couple dancing forms like swing or salsa give you the added benefit of learning to coordinate body movements with someone else’s movements, which is a great skill to develop for things like throwing. You may laugh or have trouble seeing the relevance, but the skills you learn in dancing have a lot of cross-over into the martial arts.
These are my top recommendations but I’d love to hear what other people do or recommend though in the comments for this post. 🙂
Foam Rollers as an Alternative to Massage
Last weekend I took a short course on using foam rollers. Foam roller exercises offer many of the same benefits of massage therapy without the massive expense. It’s not all that uncommon for fitness centres to have foam rollers available to their clients. If they’re new to you, I’ll explain how they work.
How Foam Rollers Work
Foam rollers allow you to do myofascial release, a type of body work in which the practitioner applies gentle, sustained pressure on soft tissues while the superficial fascia is in traction.
The superficial fascia is a soft connective tissue just below your skin. It wraps and connects the bones, muscles, nerves and blood vessels of the body. Together, muscle and fascia are known as the myofascia system.
For various reasons including disuse, lack of stretching or injuries, the fascia and the underlying muscle tissue can become stuck together. This is called an adhesion, and it is known to restrict muscle movement. It also causes pain, soreness and reduced flexibility and range of motion.
Myofascial release softens and lengthes the fascia and breaking down scar tissue or adhesions between muscles, skin and bones. It has also been shown to relieve various muscle and joint pains such as IT band syndrome and shin splints. It also helps improve flexibility and range of motion.
Foam rollers are inexpensive (mine cost $34 Canadian taxes included) and with a bit of experimentation you can target just about any muscle group.
Foam Roller Exercises
The focal point of the seminar I attended was longitudinal immobilization, which is simply lying straight on the foam roller. The very act of lying on it, without doing any special movements, helps release tension along the spine and in the shoulders. It also helps improve posture and some research suggests that it helps increase total strength.
Here is a brief video showing how to do longitudinal immobilization:
In addition to lying on the foam roller, you can also tilt and shift your head to the sides for additional stretching for the shoulders. This really helps with a particular trigger point in my right shoulder that develops regularly on me from using a mouse. We also leaned the shoulders and hips off the foam roller to stretch the upper and lower back. I say “lean” but it’s more like spilling different parts of your body off the foam roller than gently drawing them back up again.
Our instructor also showed us a stretch for the IT band, the muscle area along the outside of the thigh. It can be quite painful, particularly if you use this muscle group a lot for things like kicking or running. But if it is painful, it means you probably really need this kind of stretch.
Here’s a video showing the IT band stretch using a foam roller:
This article really only scratches the surface of how these foam rollers can be used. If you have a particular part of your body you want to work on, chances are you can find a video on how to use a foam roller for it on YouTube. And here is a great article on fascia and myofascia release from Men’s Health Magazine.
Throwing & Being Thrown as a Workout
 The following day after a recent Shorinji Kan class, I woke up with sore muscles all over my body. This surprised me because I’m in pretty good shape and I hadn’t thought the class overly intense. And yet my muscles seemed to disagree with that conclusion.
After some thought I realized that the class had done more throwing than I had done in a while. I had led classes that had throwing in them, but I hadn’t actually taken part in such a class in some time.
Throwing, and particularly being thrown, is a great all-over workout. It uses all the muscles in your body from your neck down to your legs. And if you enjoy the training of throwing and being thrown, you don’t even notice how much work you’re doing at the time. If you do a lot of it, you can build up good endurance for martial arts training.
That’s why I like to do power throwing as an exercise on occasion in my classes. Students basically do their throws with a partner repeatedly with speed and power for a set amount of time, usually around 2-3 minutes. One partner throws the other and immediately after being thrown the uke bounces up and throws his or her partner in return. Lather, rinse, repeat, until the time period is up. I usually give my students a 1-minute break after which the students do a second round.
I highly recommend this as an intensity exercise for students with enough throwing experience. Throwing and being thrown repeatedly over longer periods of time is also a good way to develop the endurance that is required for higher level belt tests that are longer in duration.
The Usefulness of Flexibility in the Open Guard
I recently wrote a post about dealing with size differences when grappling. One thing I forgot to mention is that flexibility, especially in the hip and inner thighs, is another way to combat an opponent with greater size and strength. I find it particularly useful when I’m in the open guard.
People who are bigger and stronger often aren’t as flexible and this can be a way to prevent such opponents from passing your guard without using as much strength. That’s why I tend to favour open guards when grappling, no matter who my opponent is. I simply keep my legs loose and active and use my speed and flexibility to stop my opponent as he or she tries to power through my guard. A closed guard, on the other hand, tends to utilize more strength when keeping your opponent within your guard or preventing him or her from passing.
Here is a video of me using my flexibility against an opponent who is 25 lbs heavier than me (please excuse the fogginess, it was a steamy day in the dojo when we filmed this):
Flexibility doesn’t come easily for everyone, but you can always improve it with a regular stretching regime. If you’re serious about improving your flexibility, you shouldn’t just be doing it at the dojo. Here is a good video that demonstrates various ways of doing the butterfly and other related stretches for increasing hip/ inner thigh flexibility and leg rotation:
Another stretch I like for stretching these muscles is the pigeon pose from yoga. I find it provides more leverage for increasing the stretch even further. You can see it here in this yoga video:
Even if you’re not planning to use flexibility as a cornerstone of your ground game, it’s a good idea to work on it to increase your range of motion, which helps to improve your overall ground game. This is true whether you’re training the ground for competition or self-defense. Check out my new book When the Fight Goes to the Ground: Jiu-jitsu Strategies & Tactics for Self-Defense for more information on my approach to ground defense.
Increasing Your Cardio Workout When Skipping
When you start skipping as a cardio workout, at first even a few short minutes can seem hard to do. But then as you become more coordinated and your fitness improves, you can go for longer without feeling as much strain. After a while longer, you start finding it difficult to get your heart rate up enough to work your cardio. When you reach this stage, the answer is to start doing double-skips.
Double-skipping is done by jumping once, but rotating your skipping rope around your body twice before your feet touch the ground. If you can keep your legs straight and pike your body, you can get a bit of an ab workout while doing it. Here’s a video of me doing double-skips:
It takes a bit of practice, but once you get the technique and timing down, you’ll notice that it greatly intensifies your skipping workout. So if you ever feel like you need to increase your heart rate more while you’re skipping, you can throw in a few double-skips. Even after 3-4 you can start to feel your heart working faster.
Myself, I like to do 30 seconds straight of double-skipping at the end of each 5-min round of skipping. I find it’s a great way of working my overload capacity, which can be pretty important for competition fighting, whether it’s boxing or MMA.
How to Use a Speed Bag Properly

Before I started using the speed bag, I didn’t really get what it was for. Since I started doing more boxing training, I’ve discovered that it’s a fascinating little piece of equipment with a variety of benefits. They are as follows:
1. Hand-eye coordination
2. Rhythm and timing
3. Conditioning of shoulders and arms
4. Cardio-vascular conditioning (when you get really good at it)
When using the speed bag, you have to deliver both faster and powerful repetitive punching combinations while moving your fists shorter distances than you usually use while punching. The key to this is understanding how the bag works.
First, the bag must be at the proper height. The fattest part of the bag should be level with your mouth or nose. Many people have it much too high, leading to bad form or improper/ ineffective punching technique.
When you first start punching the speed bag, it’s important to learn how to keep control over it using more efficient, short arm and fist movements and by starting slow. Most people use the bottom of their fist at first (because it’s easier) to get comfortable with the way the bag moves before moving on to specific boxing punches. Speed will come eventually come with practice. The primary goal is to keep the bag moving and in control, no matter how slowly it’s moving. Some find it helpful to count the rebounds at first. If you find that the bag swings wildly, know this: The bag is never out of control, YOU are.
You’ll eventually want to use your standard punches on the speed bag. The first ones I suggest are jabs and crosses. Don’t expect to deliver your punches the same way you do on heavy bags or focus mitts. You’ll need to maintain a circular motion to your punches. To increase your speed, start your punches closer to the bag. To get faster, you need to swing smaller. Speed is often a function of distance. With purposeful practice, not just slamming away at the bag, you’ll increase your punching power along with fist speed.
The rhythm of the speed bag is important to understand. If you hit it from the front, the next punch should arrive after an odd number of rebounds (1, 3, or 5). Most people know the hypnotic triplet rhythm of the speed bag being hit. The basis for this beat is the accents of the sound. The first rebound (off the fist) is the loudest, the second rebound (by your face) is a little softer, and the third (away from you is barely heard, and runs into the returning fist which quickly adds the next accented punch as the fist connects. 1-2-3, 1-2-3… it’s the sound you’ll come to love. It is the same sound done slower or faster. Try and hear that beat, but if three rebounds is too fast for you, or you just refuse to slow down or hit softer, then use 5 rebounds. The bag will be in the same position after 5 rebounds as it as after 3, in position to be hit from the front again.
Jab-cross combinations can be practiced with 5 rebounds as well as 3. Hooks are a little different. To practice repetitive hook combinations (i.e. left Hook, right hook), use an even number of rebounds (2 or 4). Four is best to start off with. This works because the next punch is coming from the opposite side from the last punch, and the laws of speed bag rhythm require it.
To mix hooks with other punches, the number of rebounds needed may vary, depending on the angle of the bag rebound and the angle of your fist as it connects. For example, a left hook may follow a right cross after 3 or 4 rebounds, depending on the bag angle established by the right fist and the angle your left hook enters. Practice this slowly and watch how the bag angle changes. Also, after a left hook, the left fist can return for a left jab on either 3 or 4 rebounds depending on the rebound angle. Either way, the speed bag forces you to keep you hands up for combinations.
With a patience and practice, you’ll quickly find the speed bag helps you pick off moving targets a foot or less from your face. It’s a great complement to almost any martial art.
For speed bags and a wide variety of other training tools, check out MartialArtsSupplies.com.
Medicine Ball Exercise: Standing Abdominal Drop
We like to use medicine ball exercises in our dojo for strength work-outs. One of my favourites is the standing abdominal drop featured in the video above (I’m the one on the floor.) This exercise will not give you the six-pack abs you may or may not be looking for. What it will help you do is take a blow to the gut. Allow me to explain.
The standing abdominal drop exercises the inner abdominal wall, the muscles that surround and protect all the important stuff contained in your belly. When the ball is dropped (or thrown down for a more advanced work-out), the person receiving the ball tenses their abs and breathes out in time with the blow. This not only strengthens the inner abdominal wall but also teaches you how to time the action for maximum protection with minimal effort.
To do this exercise, keep your knees bent and your head off the mat. If you’re wearing a belt, be sure to turn the knot over to the side. Centre your belt on your belly and have your partner aim the ball directly at your belt. Start by having your partner drop the ball from not too high. Most importantly, make sure you breathe out when the ball hits. If you don’t you’ll be get a winding effect that can be rather unpleasant. It doesn’t take very long, but your body does need to get used to the new exercise before you push yourself with higher drops or full-on throws.
The ball I’m using in this video weighs 5.5 kg (12 lbs.) but some people will need to start with a 4 kg ball (9 lbs.) or lighter. Be sure to use a ball that is leather bound, or at least bound with something soft. Rubber balls are too solid and will localize the blow too much in one spot. You want the blow to distribute over a wider surface.
In Can-Ryu Jiu-jitsu, we always practice self-defense combinations using light contact (5-10%) on nerve motor and pressure points. This includes blows to the solar plexus. And while a strong, well-aimed blow to the solar plexus will still have an effect even if you do have a strong inner abdominal wall, this exercise definitely helps minimize the effects.
 We're proud to announce that Lori O'Connell Sensei's new book, When the Fight Goes to the Ground: Jiu-jitsu Strategies & Tactics for Self-Defense, published through international martial arts publisher Tuttle Publishing, is now available in major book stores and online. More about it & where to buy it.